The Twin Drift guide
One rule.More possibilities.
Get to know every piece of the puzzle. Start with the basics, or jump straight to the mechanic in front of you.
The basic rule
One swipe moves both Sparks.
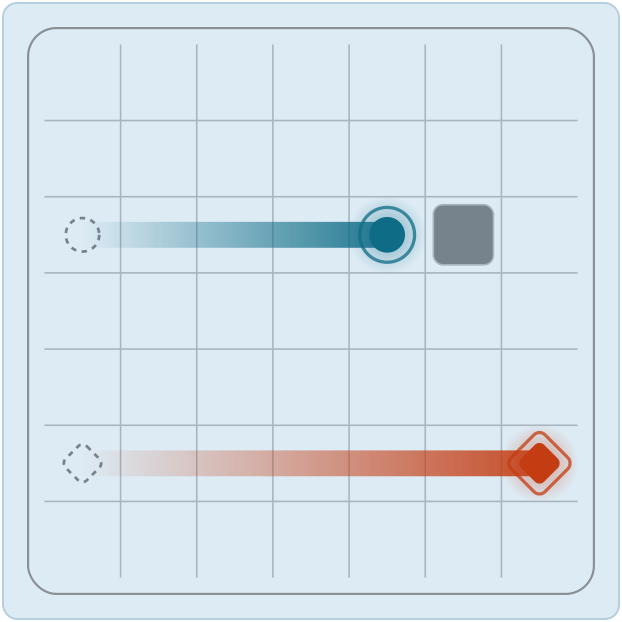
Swipe up, down, left or right. Both Sparks move together until each is stopped. Settle both on their matching docks to solve the board.
Sparks can cross or share a cell. They never block each other.
Good to know
A swipe that moves nothing and changes nothing does not count as a move.
Walls & docks
A destination is not a stopping point.
Walls and the board edge stop a Spark. Docks mark where each Spark needs to finish, but do not stop or capture it.
The circle belongs on the circle dock; the diamond belongs on the diamond dock.
Good to know
Both Sparks must be on matching docks after movement finishes. A Spark can leave a dock on a later swipe.
Identity barriers
A way through for one Spark.
An Identity Barrier lets its assigned Spark pass in either direction. It stops the other Spark, just like a wall.
Match the symbol on the barrier to the Spark, not just its color.
Good to know
The barrier sits between two cells. It does not change polarity.
Anchor tiles
Stop here. Leave next time.
An Anchor Tile stops a Spark as soon as it arrives. On the next swipe, the Spark can leave normally.
An anchor works the same way for both Sparks.
Good to know
Starting a command on an anchor does not trigger another stop.
Polarity
Same swipe. Different directions.
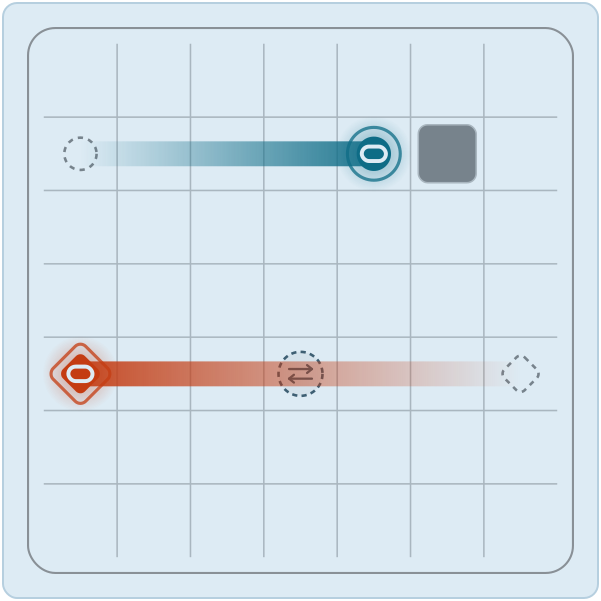
A Linked Spark moves with your swipe. An Inverted Spark moves against it. Each Spark keeps its polarity until a Phase Gate changes it.
Look inside each Spark: a closed link means Linked; a broken link means Inverted.
Good to know
The direction is set at the start of each command. Polarity and travel direction are different things.
Phase gates
Change the next move.
Crossing an applicable Phase Gate flips a Spark between Linked and Inverted. The Spark keeps moving in its current direction.
The new polarity takes effect on your next swipe, never halfway through this one.
Good to know
A gate can apply to one Spark or both. Each applicable Spark can trigger the same gate only once per command.
Pulse bridges
Match polarity to cross.
A Pulse Bridge opens when both Sparks begin the command with the same polarity. Different polarities block the way.
The bridge keeps that state for the entire swipe.
Good to know
Crossing a Phase Gate cannot change bridge access until the next command. Linked Switches do not control Pulse Bridges.
One-way gates
Follow the arrow.
A One-Way Gate lets either Spark cross in the direction of its arrow. From the other direction, it acts like a wall.
Check the direction the Spark is actually travelling, especially when it is Inverted.
Good to know
The rule compares physical travel direction with the arrow, not your swipe direction.
Linked switches & gates
Change the path as you move.
Entering a Linked Switch toggles its connected gates: closed becomes open, and open becomes closed. The change can affect the other Spark while it is still moving.
A Spark that has already stopped stays stopped for the rest of that swipe, even if the gate opens.
Good to know
Starting on a switch does not activate it: leave and re-enter. Each switch activates at most once per command. Two different switches can toggle the same gate twice.
Relay portals
A shortcut for one Spark.
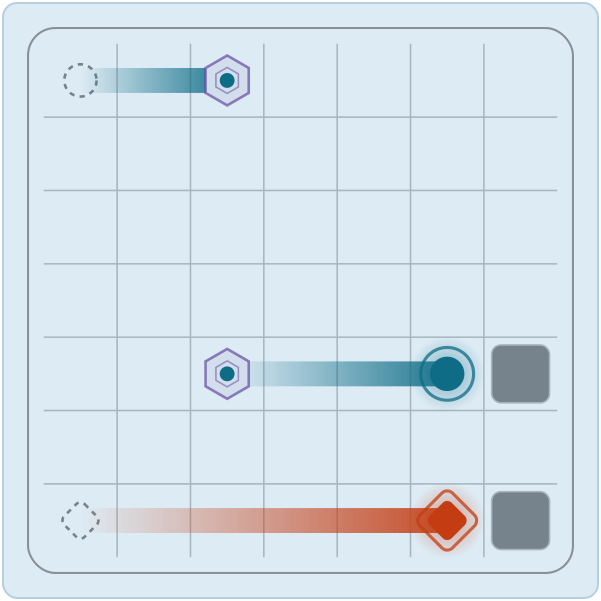
Entering either endpoint moves the affiliated Spark immediately to its paired endpoint. It keeps its physical direction and polarity, then continues until normally stopped.
Only the Spark matching the portal’s symbol teleports. The other treats the endpoint as ordinary floor.
Good to know
Arrival does not send a Spark back. It must leave and re-enter to use the pair again; a blocked exit stops it on the endpoint.
Room to experiment. Use undo to rethink a move, or restart for a fresh attempt.
Mastery marks
Each level has a move target (par), usually the fewest moves needed to solve it.
You keep every mastery mark you earn and can add more on later attempts. Ace and Solo are independent: you can earn either without the other.
- Solved
- Finish the level, with or without assistance.
- Solo
- Finish manually without requesting a hint during that attempt.
- Ace
- Finish manually in no more than the move target.
- Perfect
- Finish without hints, using the fewest moves and the lowest Drift Distance at that move count.
- Flawless
- Earn Perfect on your first try, without undoing a move, restarting, or abandoning the attempt.
Moves first. Drift Distance second.
A solve with fewer moves always ranks higher. When moves tie, lower Drift Distance wins. Drift Distance counts the movement of both Sparks: one unit per cell-to-cell step, plus one for each portal transfer. Time does not affect your score.
 Assisted
Requesting a hint makes that attempt assisted. You can still earn Solved, and Ace if you finish manually within the move target. The cap shows that you used assistance; it is separate from the five marks. Normal move previews and mechanic reminders do not count as hints. Full Solution Playback can earn Solved, but never Solo, Ace, Perfect, or Flawless.
Room to rethink
Undo removes that move and its Drift Distance. Restarting resets both to zero and begins a new, unassisted attempt. You can still earn Solo, Ace, or Perfect after either. To earn Flawless, your first completion must be Perfect, with no undo, restart, or discarded attempt along the way. Any of those permanently rules out Flawless for that level. Suspending and resuming the same attempt keeps your chance at Flawless.